Are you a cryptocurrency enthusiast looking to expand your wallet’s capabilities? Do you want to explore new blockchain networks beyond the standard options? Look no further! In this article, we’ll show you how to add a custom network in the SafePal wallet, a popular choice among crypto users.
Also Read: How to Activate the SafePal X1 Hardware Wallet: A Step-by-Step Guide
What is SafePal Wallet?
SafePal is a decentralized cryptocurrency wallet that allows users to store, send, and receive various digital assets. It supports multiple blockchain networks, including Ethereum, Binance Smart Chain, and more. However, its functionality can be extended by adding custom networks, which we’ll cover in this guide.
Why Add a Custom Network in the SafePal Wallet?
Adding a custom network in SafePal wallet offers several benefits:
- Access to new cryptocurrencies: By adding a custom network, you can store and manage tokens not supported by the standard SafePal wallet.
- Increased functionality: Custom networks can provide additional features, such as decentralized finance (DeFi) protocols or gaming platforms.
- Enhanced security: By using a custom network, you can take advantage of its unique security features and consensus algorithms.
Step-by-Step Guide to Adding a Custom Network in the SafePal Wallet
1. Prepare Your SafePal Wallet
- Make sure your SafePal wallet is updated to the latest version.
- Ensure you have a backup of your wallet seed phrase or private key.
2. Gather Network Information
- Research the custom network you want to add and gather the following information:
- Network name
- Network ID (also known as chain ID)
- RPC URL (API endpoint)
- Currency symbol (if applicable)
3. Access the SafePal Wallet Settings
- Open your SafePal wallet and navigate to the settings menu (usually represented by three horizontal lines or a gear icon).
- Scroll down to the “Advanced” or “Developer” section.
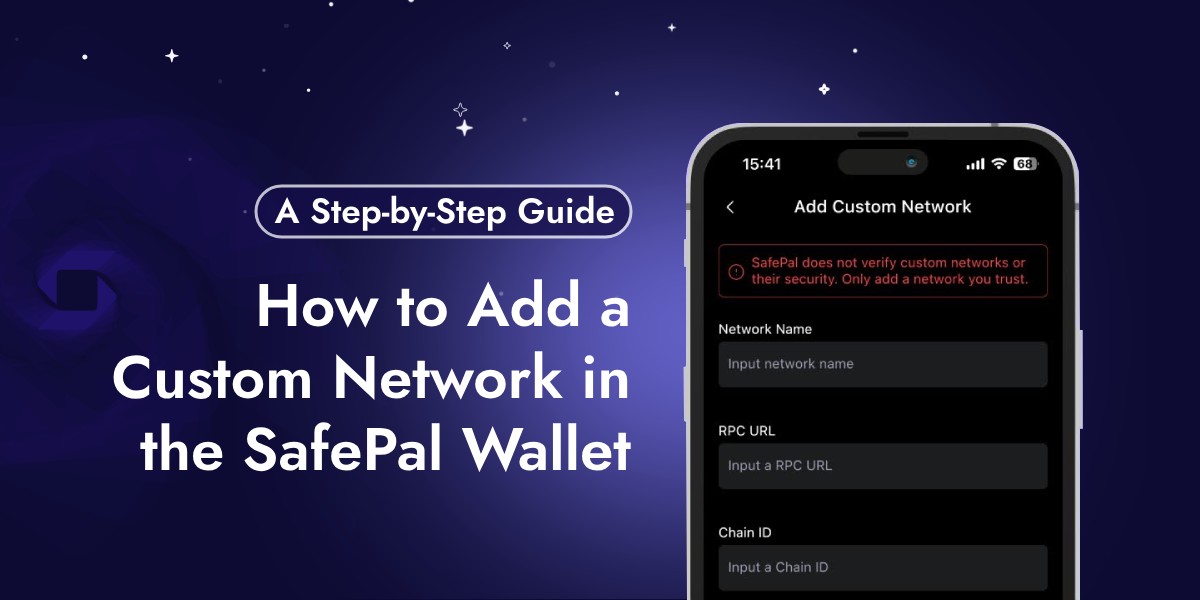
4. Add the Custom Network
- Click on “Add Custom Network” or “Add Chain.”
- Fill in the network information you gathered earlier:
- Network name
- Network ID (chain ID)
- RPC URL (API endpoint)
- Currency symbol (if applicable)
- Click “Add” or “Save” to confirm.
5. Configure the Network (Optional)
- Depending on the custom network, you might need to configure additional settings, such as:
- Gas settings (e.g., gas limit, gas price)
- Node settings (e.g., node URL, node ID)
6. Verify the Custom Network
- After adding the custom network, verify that it’s working correctly:
- Check the network’s blockchain explorer to ensure you can see transactions and balances.
- Test sending and receiving tokens on the custom network.
Conclusion
Adding a custom network in the SafePal wallet is a straightforward process that can expand your cryptocurrency horizons. By following this guide, you’ll be able to access new blockchain networks, tokens, and features, enhancing your overall crypto experience. Remember to always prioritize security and do your own research before exploring new networks.
FAQs – Related To Custom Network in the SafePal Wallet
- What if I encounter issues with the custom network?
- Refer to the custom network’s documentation or support resources for troubleshooting.
- Can I add multiple custom networks?
- Yes, you can add multiple custom networks to your SafePal wallet.
- Will adding a custom network affect my existing wallet balances?
- No, adding a custom network will not affect your existing wallet balances or assets.